How To Make Strawberry Kiwi Juice?
[su_note note_color=”#fb8e00″ text_color=”#000000″ radius=”12″]
Sipping on refreshing fruit juice is a delightful way to quench your thirst on a warm day. And In regard to strawberry kiwi juice, the combination of these two succulent fruits creates a burst of flavor that is simply irresistible.
Whether you’re looking to enjoy a homemade beverage or want to impress your friends at a gathering, learning how to make strawberry kiwi juice is a skill worth mastering. With just a few simple steps and the right ingredients, you can create a vibrant and delicious drink that will leave you craving for more. So, let’s dive into the world of strawberry kiwi juice and discover the secrets to making this tantalizing treat.
[su_box title=”
[/su_box]
Ingredients for Strawberry Kiwi Juice
1. Fresh Strawberries
Fresh strawberries are essential for making delicious strawberry kiwi juice. Choose ripe, plump strawberries that are bright red in color for the best flavor. Before using them in the recipe, make sure to wash the strawberries thoroughly and remove the stems.
2. Ripe Kiwis
Ripe kiwis add a refreshing tropical twist to the juice. Look for kiwis that are firm but yield to gentle pressure when ripe. Peel the kiwis and cut them into small pieces before adding them to the juice.
3. Water
Water is necessary to dilute the juice and achieve the desired consistency. Make sure to use filtered water to ensure a clean and pure taste. The amount of water needed may vary depending on your personal preference for the thickness of the juice.
4. Sweetener (optional)
If you prefer a sweeter juice, you can add a sweetener of your choice. Options include honey, agave syrup, or sugar. Start with a small amount and adjust to taste. Keep in mind that the natural sweetness of the strawberries and kiwis may be sufficient for some.
To make the strawberry kiwi juice, begin by blending the fresh strawberries, ripe kiwis, and water together until smooth. If desired, you can add the sweetener and blend again. If preferred, you can strain the juice to remove any pulp or seeds. Serve the juice chilled or over ice for a refreshing and healthy beverage.
For a variation, you can enhance the tanginess by adding a squeeze of lemon or lime juice, or experiment with other fruits like oranges or pineapples to create unique flavor combinations. Let your creativity flow and enjoy the vibrant and nutritious goodness of homemade strawberry kiwi juice.
[su_highlight background=”#f6b40f”]Expert Tips: Choose ripe strawberries and kiwis for maximum flavor. Use filtered water and adjust sweetener to taste. Get creative with fruit combinations for unique flavors. Enjoy the refreshing and nutritious homemade juice chilled or over ice.[/su_highlight]
Preparing the Strawberries and Kiwis
1. Washing and Hulling the Strawberries
Before you start making strawberry kiwi juice, make sure to wash and hull the strawberries properly. Follow these steps:
- Wash the strawberries: Place the strawberries in a colander and rinse them under cold water, removing any dirt or debris.
- Hull the strawberries: Gently remove the green stems or leaves from the top of each strawberry using a paring knife or your fingers.
2. Peeling and Chopping the Kiwis
After preparing the strawberries, it’s time to peel and chop the kiwis. Here’s how:
- Peel the kiwis: Use a vegetable peeler or a sharp knife to remove the fuzzy skin from the kiwis. Start from the top and slide the peeler or knife downwards.
- Chop the kiwis: Once the kiwis are peeled, cut them into small pieces. You can dice or slice them according to your preference.
| Ingredients | Quantity |
|---|---|
| Strawberries | 1 cup |
| Kiwis | 2 |
Use these quantities as a reference and adjust them based on your taste preferences or the number of servings you want to make. Once you have prepared the strawberries and kiwis, you can proceed to the next steps of making the strawberry kiwi juice.
Blending the Ingredients
1. Adding the strawberries and kiwis to a blender
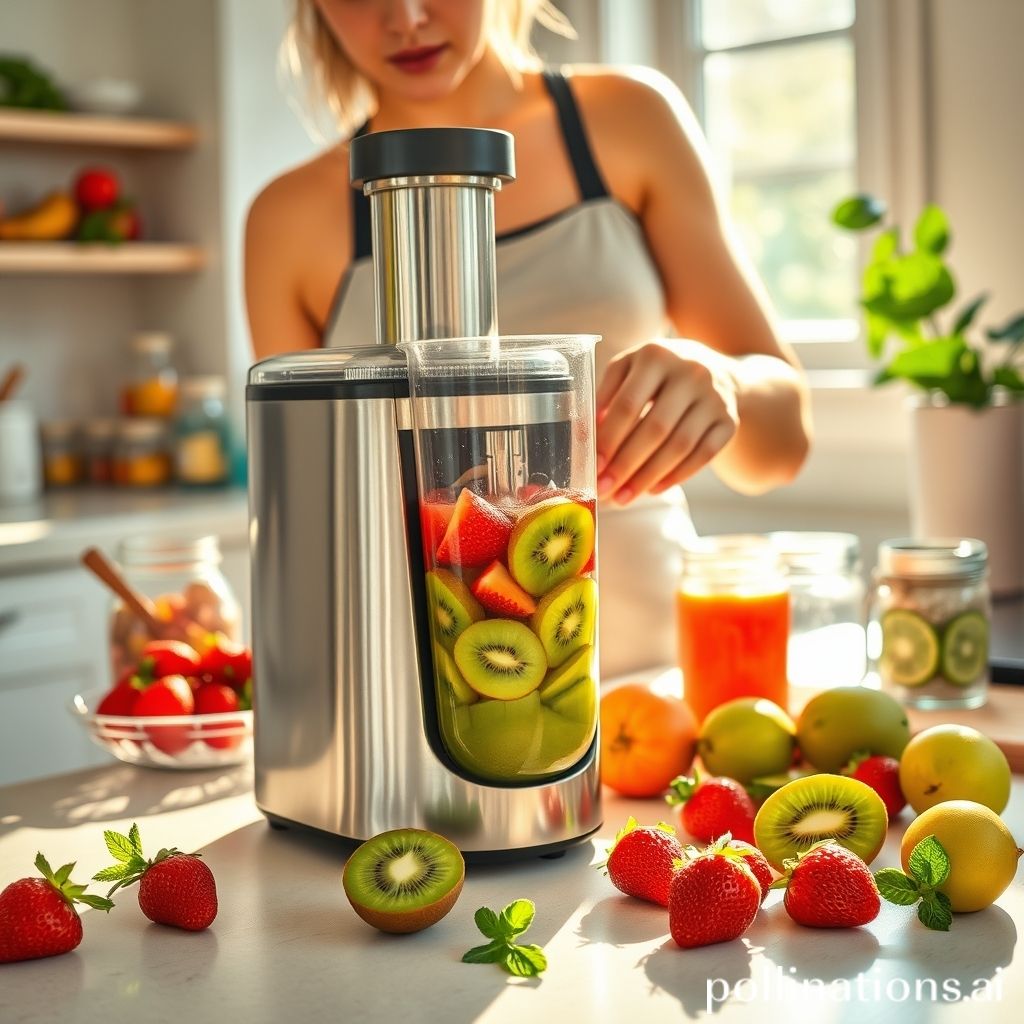
To start making delicious strawberry kiwi juice, gather fresh strawberries and kiwis. Thoroughly wash the strawberries and remove the stems. Peel the kiwis and cut them into small pieces. Place the prepared strawberries and kiwis into a blender.
2. Pouring in water and sweetener (if desired)
For a refreshing and hydrating juice, add water to the blender. The amount of water can vary depending on your desired consistency. If you prefer a sweeter taste, you can also add a sweetener of your choice, such as honey or sugar. Adjust the sweetness according to your preference.
3. Blending until smooth and well combined
Secure the lid of the blender and blend the ingredients on high speed until the mixture becomes smooth and well combined. The blending time may vary depending on the power of your blender, but it usually takes around 1-2 minutes. Make sure there are no chunks or lumps left in the mixture for a smooth juice.
Once the blending is complete, your strawberry kiwi juice is ready to be enjoyed. Pour it into a glass, add some ice cubes if desired, and garnish with a strawberry or kiwi slice for an extra touch. Savor the refreshing flavors of strawberry and kiwi in this homemade juice.
Straining the Juice (optional)
If you want a smoother texture and remove seeds or pulp, you can strain the strawberry kiwi juice. Straining is optional but can enhance your drinking experience. Here’s how to do it:
1. Gather the necessary tools
- A fine mesh strainer
- or
- Cheesecloth
2. Prepare the straining setup
If you’re using a fine mesh strainer, place it over a clean container or pitcher. If you prefer cheesecloth, line the strainer with it, making sure to cover the edges.
3. Pour the juice
Carefully pour the freshly made strawberry kiwi juice into the strainer, allowing it to flow into the container below. The strainer will catch any seeds or pulp, ensuring they don’t end up in the final product.
4. Strain thoroughly
Use the back of a spoon or a spatula to gently press down on the mixture in the strainer, helping the juice pass through At the same time leaving behind any solids. Repeat this process until you’ve strained all the juice.
5. Discard the residue
Once you’ve strained the juice, you can dispose of the collected seeds and pulp. Remove the strainer or cheesecloth from the setup and throw away the residue in a compost bin or trash.
Straining the strawberry kiwi juice results in a smoother consistency and eliminates unwanted textures. This step is particularly beneficial for those who prefer a refined drinking experience or have difficulty consuming seeds or pulp. Whether you choose to strain the juice or not, the refreshing flavors of strawberries and kiwis will make a delightful beverage.
| Benefits of Straining the Juice |
|---|
| 1. Smooth texture: Straining removes seeds and pulp, resulting in smoother juice. |
| 2. Enhanced clarity: Straining creates visually appealing, clear juice. |
| 3. Improved mouthfeel: Removing solids provides a more enjoyable drinking experience. |
| 4. Seed-free: Straining ensures the juice is free from unwanted seeds. |
[su_note note_color=”#ea2e0c” text_color=”#ffffff” radius=”8″]Extra Tips: Straining the juice creates a smooth texture, enhances clarity, improves mouthfeel, and ensures a seed-free beverage.[/su_note]
Serving and Storing
1. Pouring the Strawberry Kiwi Juice into Glasses
After successfully preparing the refreshing strawberry kiwi juice, it’s time to serve it. Grab your favorite glasses and pour the juice into them, making sure to distribute it equally. You can use tall glasses to show off the vibrant colors or opt for elegant glassware for a more sophisticated presentation.
2. Serving Immediately or Refrigerating for Later Use
Strawberry kiwi juice is best enjoyed when it’s freshly made. The flavors are at their peak, and the chilled temperature adds a refreshing touch. Serve the juice right away to savor its delightful taste.
If you have leftover juice or want to prepare it in advance for a party or gathering, you can refrigerate it. Simply cover the glasses or transfer the juice into an airtight container and place it in the refrigerator. This way, you can preserve the flavors and enjoy the juice later.
3. Storing the Juice in an Airtight Container
If you’ve made a larger batch of strawberry kiwi juice and want to store it for up to 2 days, use an airtight container. Transfer the juice from the glasses to the container, ensuring a tight seal to prevent air or moisture from entering. This will help maintain the freshness and taste of the juice for a longer duration.
Remember to store the juice in the refrigerator to keep it cool. This not only preserves the flavors but also extends the shelf life of the juice.
In summary, after pouring the strawberry kiwi juice into glasses, you can choose to serve it immediately or refrigerate it for later use. When storing the juice, use an airtight container and keep it in the refrigerator for up to 2 days. By abiding by these simple steps, you can ensure that your homemade strawberry kiwi juice remains delicious and refreshing whenever you decide to enjoy it.
Conclusion
Making strawberry kiwi juice at home is a simple and refreshing way to enjoy the flavors of these two delicious fruits. By conforming to a step-by-step guide and using fresh strawberries and kiwis, you can create a vibrant and flavorful juice that is packed with vitamins and nutrients.
Experimenting with different variations, such as adding a splash of lemon or a hint of mint, can further enhance the taste. So, grab your blender and get ready to indulge in a homemade strawberry kiwi juice that will satisfy your thirst and energize your day.
FAQ about Making Strawberry Kiwi Juice
FAQ 1: Can I use frozen strawberries and kiwis?
Yes, you can use frozen strawberries and kiwis to make strawberry kiwi juice. Freezing the fruits can help maintain their freshness and preserve their nutrients, making it convenient for juicing.
FAQ 2: How much sweetener should I add?
The amount of sweetener you add to your strawberry kiwi juice is a matter of personal preference. Some people enjoy the natural sweetness of the fruits and prefer not to add any additional sweetener. Albeit, if you prefer a sweeter taste, you can add a small amount of honey, sugar, or any other natural sweetener of your choice. Start with a teaspoon and adjust according to your taste.
FAQ 3: Can I use a juicer instead of a blender?
Yes, you can use a juicer instead of a blender to make strawberry kiwi juice. A juicer will extract the juice from the fruits In the course of separating the pulp, resulting in a smoother and pulp-free juice. Albeit, if you prefer a thicker and more fiber-rich juice, using a blender is a suitable alternative.
FAQ 4: Can I add other fruits to the juice?
Absolutely! You can experiment with adding other fruits to your strawberry kiwi juice. Popular options include oranges, pineapples, or even a handful of berries. Adding different fruits can enhance the flavor and nutritional profile of your juice.
FAQ 5: Can I make a larger batch and freeze the juice?
Yes, you can make a larger batch of strawberry kiwi juice and freeze it for later use. Freezing the juice will help preserve its freshness and allow you to enjoy it at a later time. Ensure you store it in an airtight container or ice cube trays to prevent freezer burn or contamination.
Read Similar Post:
1. Can Kiwi Juice Aid Weight Loss? Find Out the Truth Now!
2. Exploring the Health Benefits of Watermelon Juice: Unveiling its Nutritional Value