
Homemade Waffle Cones Without Maker: 5 Surprising Options to Try
You want homemade waffle cones. The kind that snap when you bite, that hold scoop after scoop without getting soggy. But you don’t own a dedicated cone maker. Maybe you’re not ready to buy one, or maybe you just moved and it’s packed somewhere. Either way, you have options.
This article walks you through five real ways to make crispy waffle cones using equipment you probably already own: a nonstick pan, an oven, a regular waffle iron, a griddle, or even a rolled-up piece of cardboard. Each method has specific temperatures, timings, and shaping tricks. I’ll also cover what can go wrong and how to fix it.
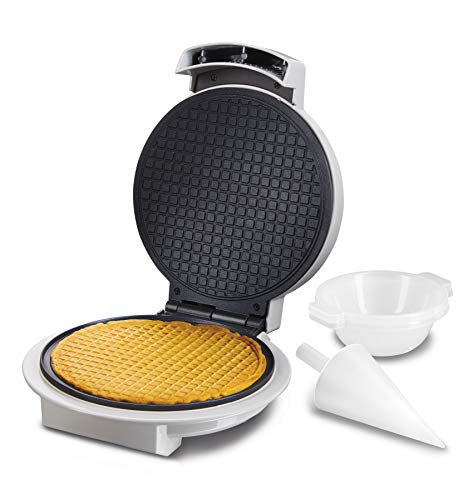
Proctor Silex
Proctor Silex Waffle Cone and Ice Cream…
COOKS CRISP BUTTERY SUGAR CONES AND BOWLS QUICKLY IN 2-3 MINUTES 800 watts of power cooks batter fast so there's less wait time between tasty waffle cones and bowls when using this waffle cone maker and waffle bowl maker machine
See on AmazonIf you do find yourself making cones often enough to want a faster, more consistent tool, a dedicated appliance like the Proctor Silex Waffle Cone and Ice Cream Bowl Maker With Browning Control (ASIN B08464TZV5) can save time. It cooks cones in about 2–3 minutes, comes with both cone roller and bowl press attachments, and stores vertically to save counter space. But if you don’t have one yet, these five methods will get you there.
Method 1: Nonstick Pan and a Spoonful of Guts
You need a small nonstick skillet or a crepe pan. A 6‑inch or 8‑inch pan works best. The batter spreads thin, so you get that lacy, bubbly texture that makes a waffle cone.
Heat the pan over medium-low. Lightly butter it. Pour about 2 tablespoons of batter and tilt the pan so it coats the bottom in a thin, even layer. Cook for 90 seconds, then flip. Another 60 seconds, and the disc should be golden with darker spots around the edges.
Here’s the tricky part: shaping. Slide the hot disc onto a clean counter. Roll it into a cone shape using a cone roller or a DIY form — I’ve used a rolled‑up piece of parchment paper wrapped around a wooden spoon handle. Press the seam gently and hold for 10 seconds. The residual heat sets the shape.
This method takes practice. First one usually ends up in my mouth, not in a cone. But after two or three tries, you’ll get the feel.
Method 2: Oven‑Baked Discs That You Shape Hot
The oven gives you even heat and lets you make several discs at once. Preheat to 350°F. Line a baking sheet with a silicone mat or parchment. Drop tablespoon‑sized mounds of batter and spread them into 5‑inch circles with the back of a spoon. Bake for 6 to 8 minutes, until the edges brown and the center looks dry.
Work fast after they come out. You have about 30 seconds before the discs stiffen. Lift one with a thin spatula, flip it, and roll it around a cone form. If you don’t have a cone roller, a clean paper towel tube wrapped in foil works. Prop the finished cone upright in a tall glass or mug to cool completely.
Oven method is the most consistent for a batch of 6 to 8 cones. The trade‑off is the race against time. Keep a damp towel nearby to wipe your fingers — the sugar burns.
Method 3: A Regular Waffle Iron Pressed Into Service
If you own a standard Belgian waffle iron, you can make cones. The trick is cooking a thin, small waffle and then shaping it while it’s hot.
Use half the batter you’d normally pour. Spread it almost to the edges. Close the iron, but don’t lock it — let the weight of the lid press down. Cook for half the normal time (about 2 minutes on a medium setting). The waffle should be crisp but still pliable.
Transfer it to your work surface, cut it in half with a sharp knife, and roll each half into a cone. The square grid pattern looks great, and the waffle texture holds up to ice cream. You can also use a bubble waffle maker if you have that style — the thicker bubbles need a slightly longer cook time, but they shape the same way.
One downside: the waffle is thicker than a traditional cone, so it cracks more easily if you overbake it. Aim for light golden, not dark brown.
Method 4: Griddle or Cast‑Iron Skillet for Large Batches
An electric griddle with a temperature dial gives you a huge, even cooking surface. Set it to 325°F. Grease lightly. Use a squeeze bottle or a ladle to make 4‑inch circles. Cook for 2 minutes per side, then shape immediately.
A cast‑iron skillet also works, but you need to keep a close eye on hot spots. Rotate the pan every minute. The advantage of a griddle is speed — you can make 4 to 5 discs at once. Perfect for parties.
Shaping on a griddle is the same as the pan method. Have your cone forms ready. I use a set of three stainless steel cones I bought cheap at a restaurant supply store. They’re worth the few dollars if you plan to do this more than once.
Comparison Table of Methods
| Method | Difficulty | Time per Cone | Equipment Needed | Crispiness | Best For |
|---|---|---|---|---|---|
| Nonstick pan | Medium | 3 min | Small nonstick pan, spatula | Very high | Single servings |
| Oven‑baked | Low | 1 min active + 8 min bake | Baking sheet, oven | High | Batch of 6–8 |
| Waffle iron | Medium | 4 min | Regular waffle iron, knife | Medium (thicker) | Novelty texture |
| Electric griddle | Easy | 2.5 min | Griddle, multiple forms | High | Large gatherings |
| Cast‑iron skillet | Hard | 4 min | Cast‑iron skillet, heat control | Very high | Retro style |
Frequently Asked Questions About Homemade Cones
Can I use regular pancake batter for waffle cones?
You can, but they won’t be crisp enough. Waffle cone batter needs sugar, butter, and a little vanilla for structure and browning. Pancake batter is designed for fluffiness, not crunch. Use a simple cone recipe: 1 egg, 1/2 cup sugar, 1/4 cup melted butter, 1/2 cup flour, 2 tablespoons water, and 1/2 teaspoon vanilla. That ratio works across all these methods.
How do I shape a cone without a cone roller tool?
Roll a piece of cardboard into a cone shape and tape it. Cover with foil so batter doesn’t stick. Or use a small glass jar — roll the hot disc around the base and hold it. A friend of mine uses the handle of a wooden spoon wrapped in a clean kitchen towel. It’s not pretty, but it works.
Why do my homemade cones turn out soggy?
Two reasons. First, the batter wasn’t cooked long enough to drive off moisture. Second, you filled them with ice cream while they were still warm. Let cones cool completely to room temperature — about 10 minutes. Store them in an airtight container filled with silica gel packs or rice to keep them dry. Do not refrigerate them; that draws moisture into the cone.
Can I make waffle bowls without a waffle bowl press?
Yes. Use the same batter, cook a larger disc (6–7 inches), then drape it over an inverted oven‑safe bowl. Press down gently and let it cool. For a deeper bowl, use a smaller ramekin. The key is pressing the hot disc into the shape while it’s still flexible. You can do this with any of the five methods above.
How should I store homemade waffle cones?
Let them cool completely. Place them upright in a tall jar or container with a tight lid. Add a food‑safe silica gel packet or a tablespoon of raw rice at the bottom to absorb humidity. Keep them in a cool, dark cabinet for up to three days. Do not freeze — the texture changes. If you need to re‑crisp, pop them in a 300°F oven for 3 minutes.
What to Do Next
- Start with the oven method if you’re new. It’s the most forgiving.
- Use a good recipe with at least 2 tablespoons of butter per cone. Butter means crisp.
- Prep your cone forms before you cook. You won’t have time to improvise.
- Cook one test disc first. Adjust heat and spread thickness.
- Store cones in an airtight container with a desiccant. Soggy cones ruin everything.
- If you bake bread at home, consider a best bread maker for dough prep — same skill set, different tool.
- When you’re ready to upgrade, a dedicated maker like the Proctor Silex mentioned above cuts cook time and shaping hassle in half.