How To Make Grape Jelly From Juice Without Pectin?
[su_note note_color=”#fb8e00″ text_color=”#000000″ radius=”12″]
Grape jelly is a delightful and versatile spread that can elevate your breakfast or snack time. Making grape jelly from juice without pectin is a simple and rewarding process that allows you to enjoy the sweet goodness of grapes in a homemade jar.
With just a few basic ingredients and easy-to-follow steps, you can create a batch of grape jelly that will impress your taste buds. In this article, we will guide you through the process, share tips and tricks, and provide you with all the information you need to create a delicious jar of grape jelly without the need for pectin. Get ready to indulge in the fruity goodness of homemade grape jelly!
[su_box title=”
[/su_box]
Collecting the Ingredients
To create grape jelly from juice without pectin, you will need to gather the necessary ingredients. Here is a step-by-step guide:
1. Selecting the appropriate grape juice
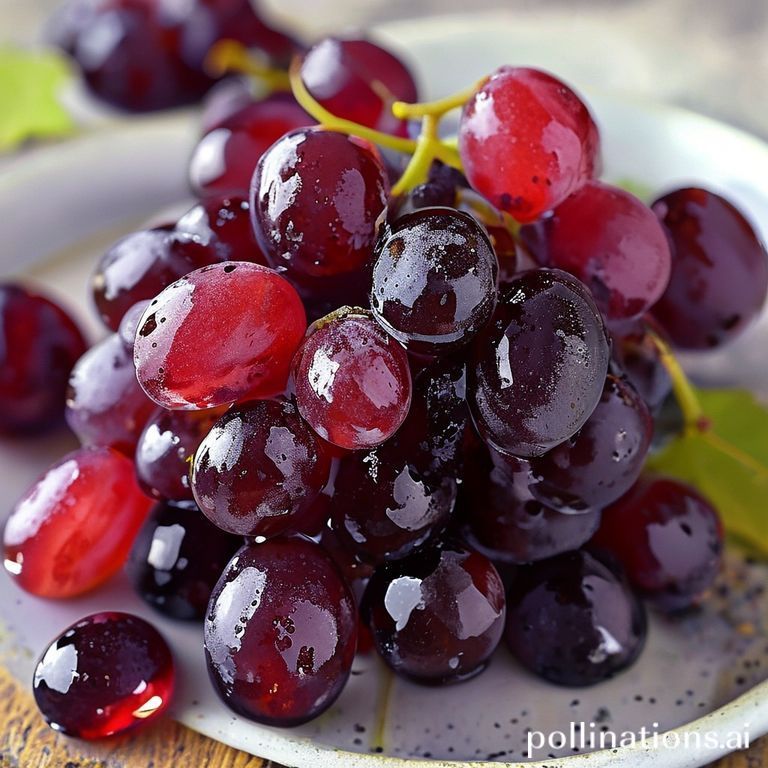
The first step is to choose the right grape juice for your jelly. Look for a high-quality grape juice that does not contain any additives or preservatives. You can either purchase grape juice from the store or make your own by juicing fresh grapes.
Tip: Opt for grape juice with a deep and rich flavor to enhance the taste of your jelly.
2. Additional ingredients required for grape jelly
Aside from grape juice, you will need a few more ingredients to make grape jelly without pectin:
- Sugar: Sugar is necessary to add sweetness to the jelly and help it set.
- Lemon juice: Lemon juice contributes acidity to the jelly, which aids in the setting process.
- Water: Water is used to dilute the grape juice and achieve the desired consistency for jelly.
Tip: The amount of sugar and lemon juice required will depend on the sweetness and acidity of your grape juice. Adjust the quantities according to your taste preferences.
[su_highlight background=”#f6b40f”]Expert Tips: Choose high-quality grape juice without additives. Add sugar and lemon juice to taste for the perfect grape jelly consistency.[/su_highlight]
Grape Juice Preparation
For making grape jelly without pectin, the first step is to prepare the grape juice. Follow these simple steps to ensure a delicious homemade grape jelly:
1. Straining the Grape Juice
To start, strain the grape juice to remove any unwanted seeds or pulp. This will give you a smooth and clear juice, perfect for making jelly. Use a fine-mesh strainer or cheesecloth to achieve the desired consistency.
2. Adjusting the Juice’s Sweetness
Next, it’s time to adjust the sweetness of the juice. Depending on the grape variety and your personal preference, you may need to add sugar or other sweeteners. Start by tasting the juice and gradually adding sweeteners, stirring well until you reach the desired level of sweetness.
| Grape Juice Preparation |
|---|
| 1. Straining the Grape Juice |
| 2. Adjusting the Sweetness of the Juice |
Grape Jelly Cooking
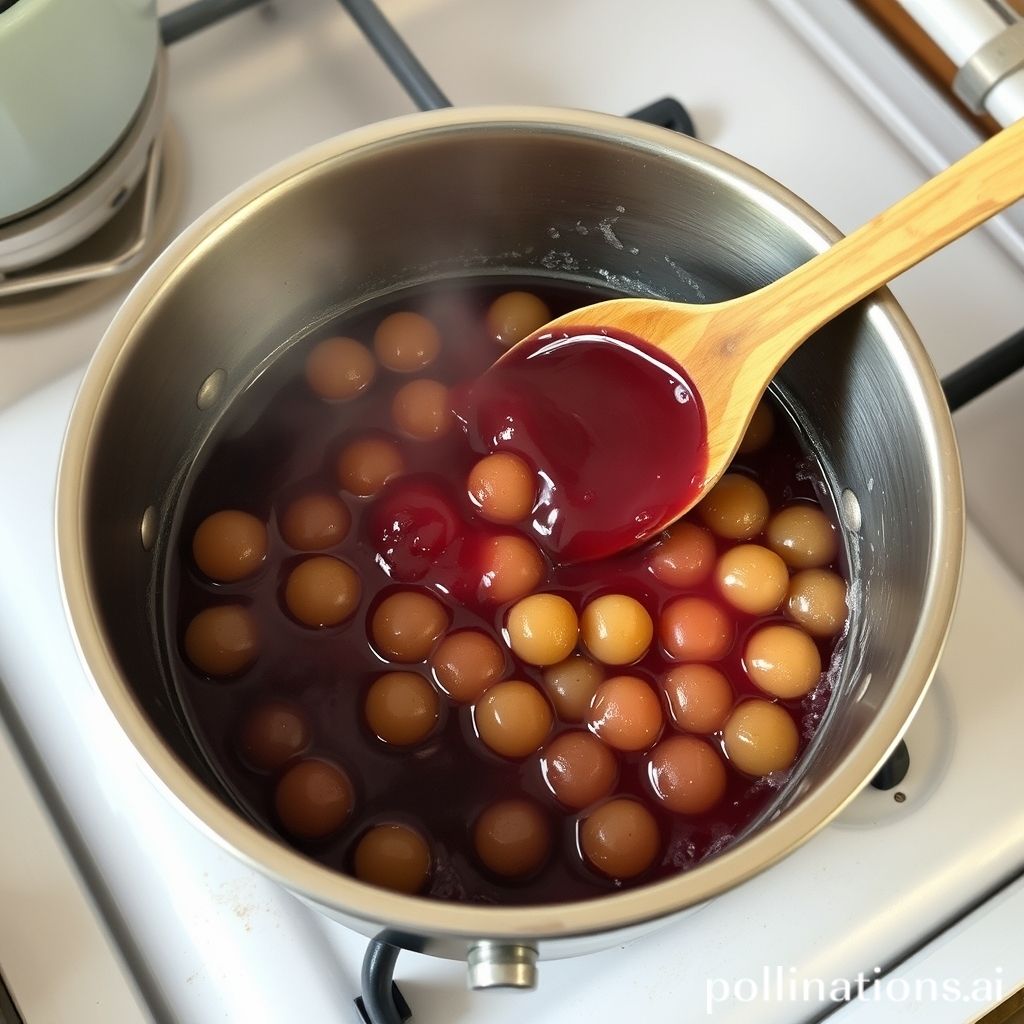
1. Boiling the Grape Juice
To make grape jelly from juice without pectin, start by boiling the grape juice. Pour the juice into a saucepan and heat it over medium-high heat. Stir occasionally to prevent sticking and burning. Once the juice starts boiling, reduce the heat to medium and simmer for about 10 minutes.
2. Adding Sugar and Other Ingredients
After simmering the grape juice, it’s time to enhance the flavor and texture of the grape jelly. Add sugar to the boiling juice, stirring constantly until it’s dissolved. For a tangy twist, add a squeeze of lemon juice, and a pinch of salt to balance the flavors.
Continue cooking the mixture over medium heat, stirring occasionally, until it reaches the desired consistency. Test the consistency by placing a small amount of jelly on a chilled plate and letting it cool for a few seconds. If it sets and wrinkles when touched, it’s ready. If not, continue cooking and testing until the desired consistency is achieved.
Once the grape jelly is ready, remove it from the heat and let it cool for a few minutes. Transfer it into sterilized jars, leaving some space at the top for expansion. Seal the jars tightly and let them cool completely before storing in the refrigerator. Enjoy the homemade grape jelly on toast, biscuits, or as a sweet filling for pastries and desserts.
Testing for Doneness
- 1. Using the Plate Test Method
- 2. Checking the Temperature with a Candy Thermometer
| Information |
|---|
To ensure the grape jelly is properly cooked and ready for consumption, it is important to test for doneness. There are two common methods to determine if the jelly has reached the desired consistency:
1. Using the Plate Test Method:
This simple yet effective method involves placing a small amount of the jelly onto a chilled plate. Let the jelly cool for a moment, then run your finger through it. If the jelly wrinkles and holds its shape, it has reached the desired consistency. If it is still runny, continue cooking and retest after a few minutes.
2. Checking the Temperature with a Candy Thermometer:
For more precise results, you can use a candy thermometer to monitor the temperature of the cooking jelly. The ideal temperature for grape jelly without pectin is around 220°F (104°C). Once the jelly reaches this temperature, it is considered done and can be removed from heat.
[su_note note_color=”#ea2e0c” text_color=”#ffffff” radius=”8″]Extra Tip: Ensure your grape jelly is perfectly cooked by testing for doneness using the plate test method or checking the temperature with a candy thermometer![/su_note]
Jar Sterilization and Filling
1. Preparing the Jars for Canning:
Prior to filling the jars with delicious grape jelly, it is important to make sure they are properly sterilized. Sterilization helps eliminate any harmful bacteria, ensuring the longevity and safety of your homemade jelly. To sterilize the jars, follow these steps:
- Step 1: Clean the jars and lids with hot, soapy water, removing any dirt or residue.
- Step 2: Rinse the jars and lids thoroughly with hot water to remove any soap residue.
- Step 3: Place the jars upright in a large pot and fill it with enough water to completely cover the jars.
- Step 4: Bring the water to a rolling boil and let the jars boil for at least 10 minutes.
- Step 5: Carefully remove the jars from the boiling water using jar tongs and place them on a clean towel to cool.
2. Filling the Jars with Grape Jelly:
Now that your jars are sterilized, it’s time to fill them with your delicious grape jelly. Follow these steps to ensure a successful and flavorful filling:
- Step 1: Prepare your grape jelly mixture according to your recipe, making sure it is hot and ready for canning.
- Step 2: Carefully pour the hot grape jelly into the sterilized jars, leaving about 1/4 inch of space at the top.
- Step 3: Use a clean, non-metallic utensil, like a chopstick or plastic spatula, to remove any air bubbles from the jars.
- Step 4: Wipe the rims of the jars with a clean, damp cloth to remove any jelly residue.
- Step 5: Place the sterilized lids on the jars and screw on the bands until they are just tight enough.
- Step 6: Process the filled jars in a boiling water bath canner for the recommended time according to your recipe.
- Step 7: After the processing time, carefully remove the jars from the canner and let them cool on a clean towel.
Following these steps will ensure that your grape jelly is safely sealed in sterilized jars, ready to be enjoyed or gifted to loved ones.
Conclusion
Making grape jelly from juice without pectin is a simple and delicious process. By using natural ingredients and a few easy steps, you can create a homemade grape jelly that is bursting with flavor.
This method eliminates the need for pectin, making it accessible to everyone. Whether you’re a seasoned jelly maker or a beginner, this recipe is sure to impress. So grab your favorite grape juice and get ready to enjoy the sweet and tangy taste of homemade grape jelly.
Faq about How To Make Grape Jelly From Juice Without Pectin?
FAQ 1: Can I use any type of grape juice for making jelly?
Yes, you can use any type of grape juice to make jelly. Whether it’s fresh, store-bought, or homemade, the choice is yours.
FAQ 2: Can I reduce the amount of sugar in the recipe?
Yes, you can reduce the amount of sugar in the recipe. That being said, keep in mind that sugar helps with the jelling process and preserving the jelly. So reducing the sugar may affect the texture and shelf life of the jelly.
FAQ 3: How long does homemade grape jelly last?
Homemade grape jelly, when properly sealed and stored in a cool, dark place, can last up to 1 year. That being said, it’s best to consume it within 6-8 months for optimal taste and quality.
FAQ 4: Can I use this recipe for other types of fruit juice?
Yes, you can use this recipe for other types of fruit juice. The process of making jelly without pectin is not limited to grape juice. You can experiment with different fruit juices and adjust the sugar content accordingly.
FAQ 5: What can I do if my jelly doesn’t set properly?
If your jelly doesn’t set properly, you can try re-cooking it. Bring the jelly mixture to a boil again and add a small amount of pectin or lemon juice, which can help with the jelling process. Be sure to follow the instructions carefully to achieve the desired consistency.
Read Similar Post:
1. Exploring the Purity of Grape Juice: Uncovering the Truth
2. Boost Your Immunity with Grape Juice: Cold Relief and More!