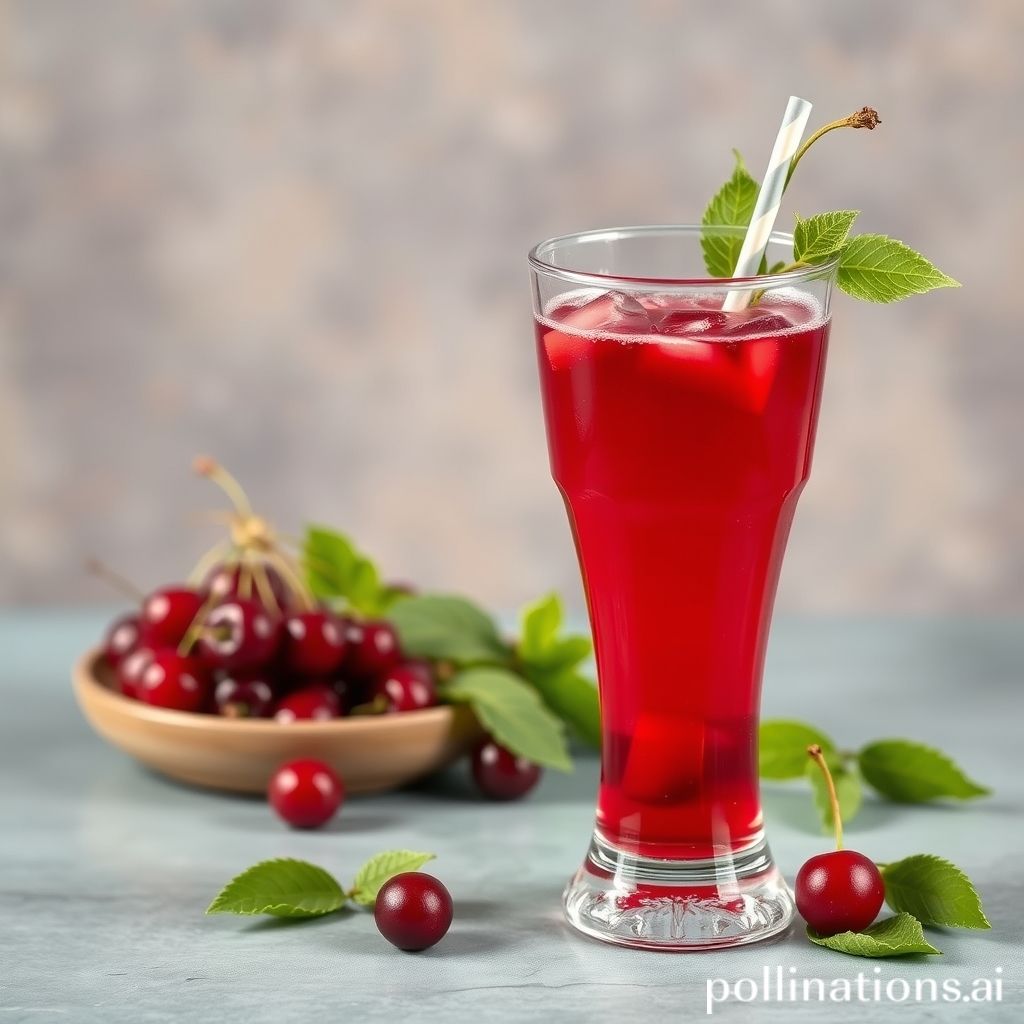
How To Make Tart Cherry Juice?
[su_note note_color=”#fb8e00″ text_color=”#000000″ radius=”12″]
If you’re craving the refreshing taste and health benefits of tart cherry juice, why not make it at home? Making your own tart cherry juice is a simple and rewarding process that allows you to control the ingredients and ensure maximum freshness. Whether you have a surplus of fresh cherries from your garden or a bag of frozen cherries in the freezer, this guide will provide you with step-by-step instructions on how to transform these vibrant fruits into a delicious and nutritious beverage.
With just a few easy steps, you’ll be sipping on homemade tart cherry juice in no time.
[su_box title=”
[/su_box]
Gathering the Ingredients and Equipment
Before you start making your homemade tart cherry juice, it is important to gather all the necessary ingredients and equipment. Here is what you will need:
1. Fresh or Frozen Tart Cherries
The first and most important ingredient for tart cherry juice is tart cherries. You can use either fresh or frozen cherries, depending on what is available to you. Fresh cherries are best when they are in season, Meanwhile frozen cherries can be used all year round.
2. Water
Water is another essential component of tart cherry juice. It helps to dilute the juice and achieve the desired consistency. Make sure to use clean, filtered water for the best results.
3. Sweetener (optional)
Adding a sweetener to your tart cherry juice is optional and depends on your personal preference. Some people prefer the natural tartness of the cherries, Meanwhile others may want to add a touch of sweetness. You can use honey, maple syrup, or any other sweetener of your choice.
4. Blender or Juicer
To extract the juice from the cherries, you will need either a blender or a juicer. A blender works well for small batches, Meanwhile a juicer is more efficient for larger quantities. Choose the option that suits your needs and the equipment you have available.
5. Strainer or Cheesecloth
After blending or juicing the cherries, you will need to strain the mixture to remove any solids and obtain a smooth juice. A fine-mesh strainer or cheesecloth can help you achieve this. Make sure to use a strainer or cheesecloth that is suitable for straining liquids.
By gathering these ingredients and equipment, you will be ready to move on to the next steps of making delicious tart cherry juice at home. Remember, the quality of your ingredients and the tools you use can greatly affect the taste and texture of the final product.
[su_highlight background=”#f6b40f”]Expert Tips: Gather fresh or frozen tart cherries, use clean water, consider adding sweetener, choose a blender or juicer, strain with a fine-mesh strainer or cheesecloth for smooth juice.[/su_highlight]
Preparing the Cherries
1. Washing the Cherries
Prior to making tart cherry juice, it is important to thoroughly wash the cherries. Follow these steps to ensure cleanliness:
- Fill a clean sink or large bowl with cold water.
- Add the cherries to the water and gently swish them around.
- Rub the cherries with your fingers to remove any visible dirt or debris.
- Drain the water and repeat the process if necessary.
By washing the cherries, you can eliminate impurities and create a clean base for your homemade tart cherry juice.
2. Removing the Stems and Pits
After washing the cherries, the next step is to remove the stems and pits. Follow this method:
- Using a sharp paring knife, gently cut around the stem of each cherry and twist it off.
- Place the cherries on a cutting board once all the stems are removed.
- Slice each cherry in half using the same knife.
- Locate the pit in each cherry half and use the tip of the knife to remove it.
Take caution when removing the pits to avoid injuries. It is recommended to wear kitchen gloves or use a cherry pitter tool for added safety and convenience.
| Cherry Preparation Tips: |
|---|
| – To save time, consider using a cherry pitter tool to quickly remove the pits from the cherries. |
| – If using frozen cherries, allow them to thaw before washing and removing the stems and pits. |
| – It is recommended to wear kitchen gloves when handling large quantities of cherries to prevent staining your hands. |
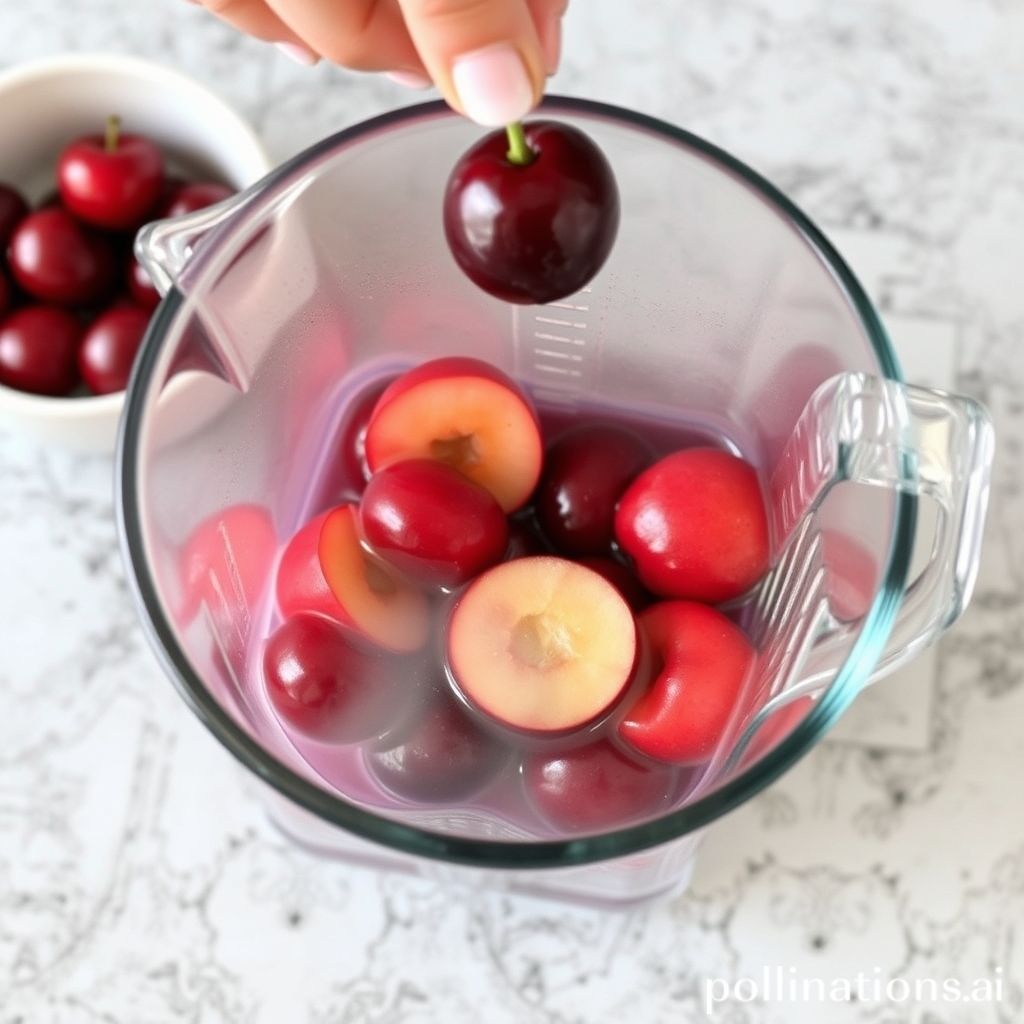
Blending the Cherries
1. Adding the Cherries to the Blender
Before blending your tart cherry juice, ensure that your cherries are prepared. Thoroughly wash them and remove any stems or pits. You can use fresh or frozen cherries for this recipe.
To add the cherries to the blender, simply place them in the blender jar. If your blender is small, you may need to blend the cherries in batches.
Tip: For a sweeter tart cherry juice, you can add a small amount of sweetener at this stage, like honey or sugar. Although, keep in mind that tart cherry juice is naturally tart, and many people enjoy its natural flavor.
2. Blending until Smooth
Once the cherries are in the blender, blend them until smooth. Start by pulsing the blender a few times to break down the cherries, then blend on high speed for about 1-2 minutes.
Tip: If you prefer a smoother consistency, strain the blended cherry mixture through a fine-mesh sieve or cheesecloth to remove any pulp or solids.
Blending the cherries thoroughly ensures that you extract all the juice and achieve a smooth texture. The vibrant red color of the tart cherry juice will be visually pleasing!
Note: Monitor the blending process to avoid overheating the cherries. If your blender starts to heat up, pause and let it cool down before continuing.
Now that the cherries are blended, you are one step closer to enjoying your homemade tart cherry juice. Next, we’ll move on to the final step: straining and storing the juice.
Straining the Juice
1. Placing the Strainer or Cheesecloth
To strain the tart cherry juice, you will need a strainer or cheesecloth. Place the strainer or cheesecloth over a large bowl or container to catch the juice as it strains.
2. Pouring the Blended Mixture into the Strainer
Once you have blended the cherries into a smooth mixture, carefully pour the mixture into the strainer or cheesecloth. Make sure to pour it slowly to allow the juice to strain through In the course of leaving behind any solids or pulp.
3. Pressing and Straining the Juice
After pouring the blended mixture into the strainer, use a spoon or spatula to press down on the mixture. This will help squeeze out any remaining juice from the pulp. Continue pressing and straining until you have extracted as much juice as possible.
Remember to collect the strained juice in the bowl or container placed beneath the strainer or cheesecloth. You can discard the solids or use them for other purposes such as baking or composting.
| Information |
|---|
| – Straining the juice helps remove any solids or pulp from the cherry mixture. |
| – Using a strainer or cheesecloth ensures that only the liquid juice passes through. |
| – Pressing the mixture helps extract every last bit of juice from the pulp. |
[su_note note_color=”#ea2e0c” text_color=”#ffffff” radius=”8″]Extra Tips: Straining the juice ensures a smooth texture, a strainer or cheesecloth is essential, and pressing the mixture maximizes juice extraction.[/su_note]
Sweetening the Juice (Optional)
1. Adding Sweetener to Taste
When making homemade tart cherry juice, the amount of sweetener you add is based on your personal preference. Some people enjoy the natural tartness of the cherries and prefer unsweetened juice, In the course of others find it too sour and choose to add a sweetener.
If you decide to sweeten your juice, there are several options available. Many people use natural sweeteners like honey or maple syrup, as they not only add sweetness but also complement the tartness of the cherries with their own flavors.
To sweeten the juice, start by adding a small amount of sweetener and taste it. Gradually increase the amount until you reach your desired level of sweetness. Keep in mind that it’s easier to add more sweetener than to remove it, so it’s best to start with a conservative amount.
2. Stirring or Blending to Combine
Once you’ve added the sweetener to your tart cherry juice, it’s important to mix it thoroughly to ensure even distribution. You have two options for this: stirring or blending.
If you prefer a more rustic approach, simply use a spoon to stir the juice and sweetener together. Make sure to stir vigorously to fully incorporate the sweetener.
Alternatively, if you want a smoother consistency and a more unified flavor, consider using a blender. Pour the cherry juice and sweetener into a blender and blend on low speed for a few seconds until well combined. Be careful not to over-blend, as this can introduce excess air into the juice and affect its taste and texture.
Whether you choose to stir or blend, the goal is to achieve a homogeneous mixture where the sweetener is evenly distributed throughout the tart cherry juice, resulting in a balanced and delightful beverage.
Conclusion
Making tart cherry juice at home is a simple and rewarding process. By adhering to the step-by-step instructions and tips provided in this article, you can easily create delicious homemade tart cherry juice using fresh or frozen cherries.
Once you have made the juice, remember to refrigerate it properly to maintain its freshness and quality. When serving and enjoying the tart cherry juice, feel free to get creative and experiment with different serving methods to enhance your overall experience. Cheers to a refreshing and nutritious glass of homemade tart cherry juice!
FAQ about How to Make Tart Cherry Juice
FAQ 1: Can I use canned cherries instead of fresh or frozen cherries?
Yes, you can use canned cherries to make tart cherry juice. Nonetheless, it is important to note that canned cherries may contain added sugars or preservatives, which can alter the taste and quality of the juice. Fresh or frozen cherries are generally recommended for the best flavor and nutritional value.
FAQ 2: How long does homemade tart cherry juice last?
Homemade tart cherry juice can typically last for up to 5-7 days when stored in an airtight container in the refrigerator. It is important to consume the juice within this time frame to ensure freshness and prevent spoilage.
FAQ 3: Can I freeze the homemade tart cherry juice?
Yes, you can freeze homemade tart cherry juice. Freezing the juice can help extend its shelf life for up to 6 months. Make sure to store the juice in a freezer-safe container, leaving some space at the top for expansion. Thaw the juice in the refrigerator before consuming.
FAQ 4: Is it necessary to strain the juice?
Straining the juice is not necessary, but it can help remove any pulp or solids, resulting in a smoother consistency. If you prefer a pulp-free juice, you can strain it using a fine-mesh strainer or cheesecloth. Nonetheless, leaving the pulp in the juice can provide additional dietary fiber.
FAQ 5: Can I use a juicer instead of a blender?
Yes, you can use a juicer instead of a blender to make tart cherry juice. A juicer extracts the juice from the cherries In the course of separating the pulp, resulting in a smooth and pulp-free juice. Nonetheless, using a blender can also yield satisfactory results by blending the cherries and then straining the mixture. The choice between a juicer and a blender depends on personal preference and the desired consistency of the juice.
Read Similar Post:
1. Can Cherry Juice Boost Urine Production? Find Out Here
2. The Power of Cherry Juice: Unlocking Health Benefits and Enhancing Your Well-being