How To Make A Banana Milkshake With A Blender
You grab a banana off the counter, tired of eating it plain. You want something cold, creamy, and satisfying. But every banana milkshake you’ve tried at home turns out either watery or too thin, or it splatters all over your counter because you didn’t layer ingredients right. That frustration is exactly why this article exists. By the time you finish reading, you’ll know exactly which ingredients work, how much of each to use, the one blending order that prevents a mess, and two tricks to get a thick shake without relying on ice cream.
Let’s start with the basics. A banana milkshake is just banana, milk, and something to thicken it — ice cream, yogurt, or even frozen banana chunks. The blender does the work, but the technique matters more than you’d think. I’ve tested dozens of combinations over the years, and I’ve settled on a handful of reliable methods that deliver every time. No guesswork, no wasted ingredients.
Banana Loca
Banana Loca® Kitchen Gadget - Core &…
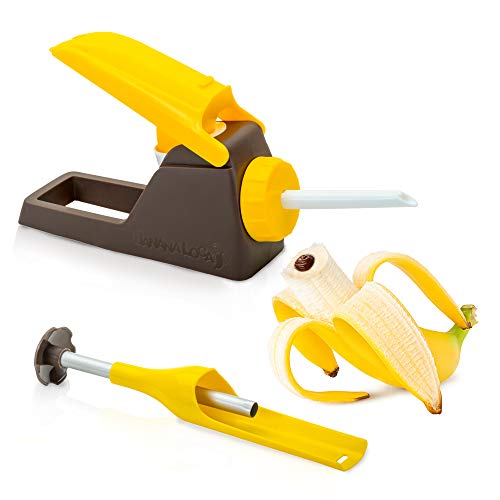
🍌 Banana Loca is an innovative kitchen gadget that straightens a banana, cores it while still in the peel
See on AmazonOne gadget that makes the whole process cleaner and faster is the Banana Loca. It cores a banana while it’s still in the peel, and it straightens it if your banana is curved. You fill the hollow center with Nutella, peanut butter, or yogurt before blending. That means you get flavor infused all the way through the milkshake, not just swirled on top. It’s a simple plastic tool that snaps into place — takes about five seconds. If you like making banana-based drinks or snacks regularly, it saves you from sticky fingers and uneven mixing.
The Three Rules of a Perfect Banana Milkshake
I’ve broken down the process into three rules. Memorize these and you’ll never make a sad shake again.
Rule 1: Use Frozen Bananas for Body
A room-temperature banana blends into a thin, almost watery liquid. That’s fine if you’re making a smoothie with lots of ice, but a milkshake needs body. Freeze your bananas first. Peel them, slice them into 1-inch rounds, and lay them flat on a parchment-lined baking sheet. Freeze for at least 2 hours. Once frozen, transfer to a zip-top bag. They’ll keep for 3 months. One frozen banana replaces about half a cup of ice cream in terms of thickness. That means you can make a rich shake with less sugar and fat.
If you forget to freeze bananas, you have two options. Option A: use ice cubes (about 4-6 cubes per banana) and accept a slightly icier texture. Option B: add 3 tablespoons of plain Greek yogurt — it adds creaminess without watering things down.
Rule 2: The Right Milk Ratio
Too much milk and you get banana-flavored milk. Too little and the blender struggles. The sweet spot is 1 cup of milk per 1 large frozen banana. For whole milk, that yields a consistency close to a fast-food shake. If you use skim or plant-based milk (oat milk works best; almond milk is thinner), cut the milk to ¾ cup. Plant milks have less fat, so the shake will be slightly less luxurious but still drinkable. If you want a thicker shake, reduce milk to ½ cup and add ¼ cup of ice cream (vanilla or banana flavored).
Rule 3: Layer Correctly to Avoid Air Pockets
This is the most overlooked part. You cannot just dump everything in and hit blend. Here’s the order: put the liquid in first (milk), then any soft add-ins (yogurt, peanut butter, honey), then the frozen banana chunks, then any ice cream or ice cubes on top. The liquid at the bottom allows the blades to start spinning immediately, pulling the solid ingredients down. No cavitation, no motor strain, no scraping the sides with a spatula every five seconds. And always start on low speed for 10 seconds, then ramp up to high for 20-30 seconds. Total blending time: about 40 seconds. Any longer and friction heat will thin the shake.
How to Customize Your Banana Milkshake (Without Making a Science Experiment)
Once you’ve mastered the base, you can riff. Here are four variations that I use regularly, each with a specific tweak to the ratios.
- Chocolate Banana: 1 frozen banana, 1 cup whole milk, 2 tablespoons cocoa powder, ½ tablespoon maple syrup. Blend as above. The cocoa powder needs the milk to dissolve — add the powder after the milk but before the banana.
- Peanut Butter Power Shake: 1 frozen banana, ¾ cup oat milk, 2 tablespoons peanut butter (creamy or crunchy), ¼ teaspoon cinnamon. This one is thick enough to eat with a spoon. Add an extra tablespoon of milk if the blender struggles.
- Tropical Twist: 1 frozen banana, ½ cup coconut milk, ½ cup pineapple chunks (frozen works too), 1 tablespoon lime juice. Skip any sweetener — the pineapple is enough.
- Vegan and Creamy: 1 frozen banana, 1 cup unsweetened soy milk, ¼ cup raw cashews (soaked in hot water for 15 minutes, then drained). The cashews blend into a silky fat that mimics heavy cream. You’ll need a high-speed blender for this one; a basic 300-watt model will leave grainy bits.
Why Your Blender Choice Actually Matters
Not every blender handles frozen bananas equally. I’ve used a $30 personal blender and a $400 countertop model. Both can make a shake, but the results differ in smoothness and time. A personal blender (like a single-serve smoothie cup) works fine for one shake. The narrow container forces ingredients into the blades efficiently. But the motor is usually weaker, so you’ll need to stop and shake the cup or stir with a spoon. A full-size blender with a 64-ounce jar gives you room for double batches but can leave chunks if you don’t use the tamper. The best compromise for most homes is a mid-range model (500-700 watts) with a 32-ounce jar. It handles one frozen banana plus milk easily, and the wider jar lets you scrape the sides without disassembling.
If you make single servings often, consider a single-serve smoothie blender. Many of those come with travel cups, so you blend and drink from the same container. Just watch for noise — personal blenders are loud because the motor sits directly under the cup with little insulation. And if you want portability for shakes on the go, a portable blender cup that runs on a rechargeable battery is handy, though the power is lower — you’ll need to chop bananas into smaller pieces first.
Comparison: Ice Cream vs. Frozen Banana vs. Yogurt as Thickeners
| Thickener | Calories (per serving) | Fat Content | Flavor Impact | Best For | Blend Time |
|---|---|---|---|---|---|
| Vanilla ice cream (½ cup) | ~140 | 7-10g | Adds sweet vanilla notes | Classic diner-style shake | 25 seconds |
| Frozen banana (1 medium) | ~105 | 0.4g | Pure banana flavor, no extra sweetness | Healthy, dairy-free base | 35 seconds |
| Greek yogurt (¼ cup) | ~60 | 0-4g (depends on type) | Slight tang, less creamy | High-protein, low-fat shake | 30 seconds |
The table shows real trade-offs. Ice cream makes the richest shake but adds sugar and fat. Frozen banana gives you a clean banana taste and keeps calories low, but you need to blend longer. Greek yogurt is leanest but doesn’t thicken as much — you’ll end up with a drinkable consistency, not a spoonable one. Pick based on what you want that day.
Frequently Asked Questions
Can I use a regular blender for a banana milkshake, or do I need a high-speed one?
A regular blender works fine as long as you follow the layering rule. I’ve made hundreds of shakes in a basic Oster blender from the 1990s. The only problem is if you add whole ice cubes or large frozen banana chunks — break them into smaller pieces first. If your blender bogs down, add 2 tablespoons more milk and pulse.
Why is my banana milkshake foamy?
Foam comes from over-blending or a blender that whips air into the mix. Stop blending as soon as you hear the sound change from chopping to whooshing. Total time: 30-45 seconds. Also, using very ripe bananas (brown spots) creates more foam because the sugars break down faster. Use bananas that are yellow with just a few specks.
Can I make a banana milkshake without a blender?
Yes, but it’s tedious. Mash the banana with a fork until smooth, then whisk vigorously with milk in a bowl. You’ll get a lumpy drink, not a silky shake. A immersion blender (stick blender) works better than a fork but still leaves thin spots. Stick with a countertop blender if you want the real deal.
How long does a banana milkshake last in the fridge?
About 2 hours before it separates and turns brown. Banana oxidizes quickly after blending. If you must store it, pour into an airtight jar, fill to the brim to minimize air, and refrigerate. Stir or re-blend for 5 seconds before drinking. Don’t freeze the finished shake — the texture gets icy and grainy.
Can I add protein powder without ruining the texture?
Yes, but it changes the consistency. Add 1 scoop (about 25-30g) of vanilla or unflavored protein powder along with the milk. Keep the same liquid ratio — the powder will absorb some moisture, so the shake will be slightly thicker. If it gets too thick to pour, add 2-3 tablespoons of milk after blending. Whey protein blends smoother than plant-based powders, which can leave a sandy feel.
What I Want You to Remember
- Use frozen banana slices for thickness — skip the ice cream unless you want a dessert bomb.
- Pour milk into the blender first. Then soft stuff. Then frozen stuff. This order prevents clogged blades.
- Blend on low for 10 seconds, then high for 20-30. Stop when it sounds smooth, not after a timer.
- One banana + one cup of whole milk makes a standard shake. Adjust milk down if you use a plant-based alternative.
- If you add ice cream, use only ¼ cup to keep the shake thick but not over-sweet.
- Clean the blender immediately after pouring — dried banana takes scrubbing.
- For a quick flavor boost, use the Banana Loca gadget to core and fill the banana with Nutella or peanut butter before freezing. That way the filling mixes evenly without extra steps.
