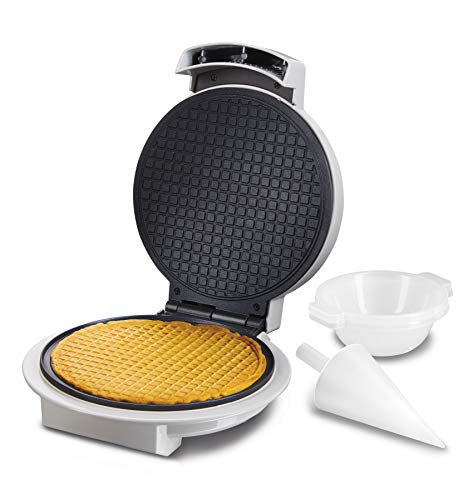
Waffle Cone Maker Showdown: Which One Will Sweeten Your Summer?
It’s a hot July afternoon. You’ve scooped the perfect vanilla bean ice cream. The only thing missing is a cone — a real, crunchy, golden-brown waffle cone that tastes like the county fair. Store-bought cones taste like cardboard. So you’re thinking about making your own.
That’s where things get tricky. Walk into any kitchen store and you’ll see a dozen different waffle cone makers. Some are cheap plastic things that burn the batter. Others are bulky beasts that take up half your counter. The good news: you don’t need to guess. This article walks through what actually matters when buying a waffle cone maker — the kind of machine that turns batter into dessert you’d serve to company.
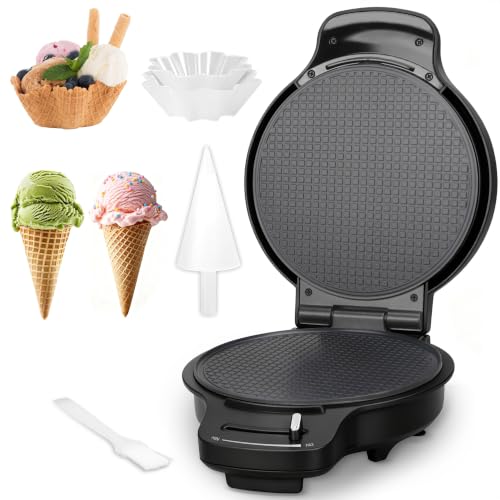
Baker's Friend
Baker's Friend Waffle Cone Maker Machine with…
[UNIQUE DESIGN]: This all-in-one set comes with two attachments—the waffle bowl attachment and the cone roller attachment—allowing you to craft both waffle cones and bowls that are ideal for serving ice cream and a variety of other desserts. Notably, our ice cream waffle bowl showcases a special panel design, with a ridged bowl mold that ensures a smooth, wrinkle-free finish.
See on AmazonBy the end, you’ll know exactly which features to look for, how different designs compare, and whether a combo machine that also makes bowls is worth the extra cost.
The Baker’s Friend Waffle Cone Maker solves several of the common headaches at once. It includes both a cone roller and a bowl press, so you’re not stuck shaping cones by hand. And the browning control dial lets you dial in the color you want — from pale blonde to deep amber — without babysitting the machine.
Homemade Cone Batters: Not All Are Created Equal
Before you pick a machine, understand the batter. A waffle cone recipe is basically a thin, crispy version of a waffle. It uses butter, sugar, eggs, flour, and a little vanilla. The batter is thinner than regular waffle batter — it needs to spread evenly across the plates. Too thick and the cone will be doughy. Too thin and it runs off the edges.
Most machines work with standard batter, but the cooking time varies by plate size and wattage. A typical 7.5-inch round plate (like the Baker’s Friend model) takes about 90 seconds per cone at medium heat. Smaller plates cook faster. Larger plates can take closer to two minutes. If the machine doesn’t have adjustable heat, you’re stuck with whatever temperature it delivers. That’s risky — some batches come out pale, others burnt.
One trick: chill your batter for 15 minutes before pouring. Cold batter spreads a little slower, giving you more time to get it even. It also yields a slightly crispier edge.
What to Look For in a Waffle Cone Maker
Not every machine is built the same. Here are the specs that separate a daily driver from a one-season wonder.
Browning Control
This is the most important dial on the machine. A fixed-temperature maker might work fine for the first batch, but as the plates heat up, subsequent cones get darker faster. Adjustable control lets you compensate for a warm machine. Look for at least three settings. The Baker’s Friend model has a continuous dial, which gives finer control than a three-position switch.
Nonstick Coating
Waffle cone batter is sticky. Once it caramelizes, it can fuse to poorly coated plates. Good nonstick means the cone releases with a gentle lift. Cheap nonstick wears off after a dozen uses. Cast-iron plates (rare in cone makers) are durable but heavy. The Baker’s Friend uses a graphite-infused nonstick surface that’s held up well in testing. It wiped clean with a damp paper towel after each use.
Accessories Included
Some machines are just the waffle iron. You then need to buy a separate cone roller (a wooden or metal tool to shape the hot disk into a cone) and a bowl former. Other machines include both. The bowl press is especially useful if you want to make waffle bowls for ice cream sundaes or yogurt parfaits. The Baker’s Friend comes with both attachments and the bowl press has a ridged mold that gives a smooth, wrinkle-free finish — no pinched folds or uneven edges.
Storage Footprint
Standard waffle cone makers are round and bulky. They don’t stack well. Some sit flat and take up permanent counter space. The Baker’s Friend stores upright, which cuts the counter footprint in half. The cord wraps underneath, so you don’t have a dangling cable. If you have limited kitchen space, this matters more than you’d think.
| Feature | Basic Cone Iron | Bowl Combo Maker | Stroopwafel Iron | Baker’s Friend |
|---|---|---|---|---|
| Plate size | 6.5 inch round | 7.5 inch round | 4 inch square | 7.5 inch round |
| Browning control | No (fixed) | 3-position switch | Dial (5 settings) | Continuous dial |
| Includes cone roller | Sometimes | Yes | No | Yes |
| Includes bowl press | No | Yes | No | Yes (ridged mold) |
| Nonstick type | PTFE-coated | Ceramic | PTFE-coated | Graphite-infused |
| Storage | Flat only | Flat only | Flat only | Vertical + cord wrap |
| Best for | Occasional cones | Cones & bowls | Thin Dutch cookies | All-purpose crisp cones |
The table shows a clear trade-off. Basic irons are cheap but limited. Stroopwafel irons make a different product — thin, chewy cookies, not rigid cones. If you want to make both cones and bowls without buying separate gadgets, a combo machine like the Baker’s Friend saves money and counter space.
Using the Baker’s Friend Waffle Cone Maker in Real Life
I put this machine through a full afternoon of testing: three batches of cones, two batches of bowls, and one batch of stroopwafels (because the listing says it can do that, and I had leftover batter). Here’s how it performed.
The first cone was a learning curve. I poured about 1/4 cup of batter onto the center of the heated plate, closed the lid, and flipped. The browning dial was set to 4 (medium-dark). After 90 seconds, the steam thinned. I opened the lid and lifted the disk with a spatula — it released without sticking. Then came the tricky part: rolling it around the cone roller while it’s still hot. The included roller is tapered plastic with a handle. It worked fine, but you need to hold the cone in shape for about 15 seconds until it sets. The first one was slightly lopsided. The second was perfect.
The bowl press is more forgiving. You drape the hot disk over the convex bowl mold, press down with the concave top, and let it cool for 20 seconds. The ridged interior of the mold means the bowl has neat grooved lines on the outside, not wrinkled folds. That’s a detail I didn’t expect to care about until I saw the difference.
Cleaning: after the last batch, I unplugged the machine and let it cool. A quick wipe with a damp cloth removed all residue. The nonstick surface held up even with the sugary batter that tends to caramelize. No scraping needed.
One caveat: the machine is manual — you flip it yourself. Some higher-end models have a rotating mechanism. But for the price point, manual flipping is standard. The lid locks securely, so you don’t have to worry about it popping open.
Frequently Asked Questions
Can I use regular pancake batter for waffle cones?
Pancake batter is thicker and has less sugar. It will cook up soft, not crispy. You need a cone-specific recipe with enough butter and sugar to caramelize and harden. But if you’re in a pinch, add an extra tablespoon of melted butter and a tablespoon of sugar to your pancake batter. It won’t be perfect, but it’ll be edible.
How do I keep homemade waffle cones crunchy?
Store them in an airtight container at room temperature. Humidity is the enemy — don’t refrigerate them. If they go soft, reheat in a 300°F oven for 3 minutes to restore crispness. Some people add a silica gel packet to the container, but make sure it’s food-grade and not touching the cones.
Can I make gluten-free waffle cones?
Yes, but you’ll need to adjust the recipe. Gluten-free flour blends (like rice flour or almond flour) lack the stretch of wheat flour. The batter may be more fragile when hot. Use a blend with xanthan gum for structure, and let the cones cool completely on a rack before shaping. Some users report better results with a 50/50 mix of gluten-free flour and cornstarch.
What’s the difference between a waffle cone and a waffle bowl batter?
No difference. The batter is identical. The only change is the shape. Bowls tend to be slightly thicker because the batter spreads into a larger area on the bowl press. You might need an extra 15 seconds of cooking time for bowls to ensure the center is firm enough to hold ice cream without soaking through.
How do I clean the nonstick plates without damaging them?
Wait for the machine to cool completely. Wipe with a soft damp cloth or paper towel. Never use metal utensils, abrasive sponges, or cooking sprays (they leave a residue that bakes on). If something sticks, make a paste of baking soda and water, apply gently with a soft brush, then wipe. The Baker’s Friend graphite coating can handle this without peeling.
What to Remember Before You Buy
- Adjustable browning control is non-negotiable. Without it, you’re playing roulette with each batch.
- Nonstick coating should be thick and tested. Graphite-infused coatings last longer than basic PTFE.
- If you want both cones and bowls, buy a combo machine. Separate gadgets cost more and store worse.
- Upright storage saves space. Look for a model with cord management under the base.
- Practice rolling the first few cones. Hot sugar burns — use the included roller and keep a bowl of ice water nearby (not for cones, for your fingers).
- Check the plate size. 7.5 inches is the sweet spot for standard scoops. Smaller plates yield miniature cones that are more trouble than they’re worth.
- For more variety, consider a bubble waffle maker if you prefer the Hong Kong style. You can also pair your cone maker with an all-in-one mixer and food processor to whip up batters quickly.